**UPDATE**
I've moved to ladybugsandlattes.com
You can find this post and more here
***
About a month ago, I searched Pinterest for Halloween costume ideas for little Cadybug. I decided to be crafty and try to make it myself. The hubby was not as excited as I was - probably because when I try to make things I find on Pinterest, he's usually the one that has to fix my projects. I tend to have an enthusiasm for crafting that does not parallel with my ability to create crafts.
But I made this one all by myself: a chocolate chip cookie costume, and I only burned myself with hot glue 3 times.
Here's how you can do it, too.
What You Will Need:
Styrofoam Circle (I used one that's 15/16 in x 7 7/8 in)
2 pieces of light brown felt
1 piece of dark brown felt, cut into chocolate chip-like pieces
dark brown ribbon
scissors
hot glue gun and hot glue
1. Hot glue one piece of light brown felt to wrap around the foam circle on one side.
2. Hot glue the second piece of light brown felt to the other side of the circle to wrap around it. Leave some felt unglued at the top to allow for the ribbon to be attached.
3. Cut slits in the top of the felt and run ribbon through it, long enough to loop over your child's head. Don't glue down the ribbon. It will be easier to loosen and tighten as needed. Glue down the little bit of extra felt at the top, leaving the ribbon loose enough to slide back and forth.
4. Cut two pieces of ribbon. They will be the ties for around the waist so make sure you measure them long enough to tie behind your child's back.
5. Hot glue the ribbons onto the back, in the middle of the cookie.
Glue the chocolate chip pieces on the front and you're done!
Documenting my attempts at being an accomplished stay at home mom and wife on a budget...
Sunday, October 7, 2012
Saturday, October 6, 2012
Footprint Calendar - Frugal Holiday Gift
**UPDATE**
I've moved to ladybugsandlattes.com
You can find this post and more here
***
Are you looking for a memorable and useful holiday gift for grandparents (or yourself)?
Working with toddlers, I have done numerous art projects that involve hand and foot prints. Really, is there anything more adorable than seeing your child's small hand painted to slightly resemble an animal of some sort?
Back in January, I had this great idea to create a calendar using hand-print art...until I tried to paint my (then) 5 1/2 month old's hand and get her to make a nice looking hand-print on paper. She was definitely not into it and I was not about to fight her 11 more times. Slightly bummed but determined, I came up with a plan b.
Footprint Calendar!
Sure, it takes two of us to do the pictures because I need my husband to help hold her foot as the paint brush tickles it endlessly, but man, these pictures make me happy.
First, I came up with different foot-print pictures that would go along with monthly themes.
January: "Snowmen"
If there's one thing we tend to see a lot of in January, it's snow.
February: "a heart for Valentine's Day"
March: "a four leaf clover for St. Patrick's Day"
April: "April Showers..." with a chick carrying an umbrella and fingerprint rain drops - this one is my favorite
May: "...Bring May Flowers"
I was able to capture a single handprint to make a flower and then two footprints to make a butterfly.
June: "Summer Fun" with a bumblebee and fish
July: "Celebrating warm weather" with flip flops
August: "Corn stalks"
What's the best part of the end of summer in Illinois? Corn on the cob.
September: "a ladybug and a caterpillar"
These pictures could tie in with an Eric Carle/Back to School theme. Really, I just thought the toe print caterpillar was adorable and I love ladybugs, so I chose the bug theme for this month.
October: "Ghosts for Halloween" Duh.
November: "Thanksgiving" - a turkey and a tree with multi-colored leaves falling
I thought this foot-print turkey was an adorable alternative to the hand-print turkey that we all made in Kindergarten.
December: "Christmas" - 2 reindeer, a Christmas tree, and thumb-print lights
After making all of this beautiful footprint art, you can use the originals to create your own calendar. If you're looking for something way easier, take photographs of each picture. Then you can submit them to one of the websites or stores that will turn your pictures into a calendar for you!
Even better? You can get one for only $5.32! Around this time of year, awesome sites like VistaPrint offer deals like a free calendar (just pay shipping).
I will update with a picture of the finished calendar once my own arrives in the mail.
Friday, October 5, 2012
Homemade Baby Wipes - Save $150 a Year!
**UPDATE**
I've moved to ladybugsandlattes.com
You can find this post and more here
***
Babies are expensive. I've heard this my whole life but I kind of brushed it off until I was watching my own bank account dwindle.
As a newlywed, I would look at other people's babies and think "Oh, how cute. I can't wait to have one of my own." Then I worked in a preschool and thought to myself "I can handle 16 kids at a time - 1 would be a breeze."
Questions that did not stream through my brain while I was consumed with baby fever:
* If diapers cost x, wipes cost y, and formula costs z, how much money will I have left for anything remotely fun for myself? Answer: Negative 14 dollars.
* When the baby starts crying, who can I hand it back to if I am the parent? Answer: Oh...no one.
* Will I ever be able to leave the house on a moment's notice or bring a purse that doesn't have eleven pockets and doesn't set off the seat-belt alarm when it's sitting on the passenger seat? Answer: Nope...unless the hubby is on baby duty.
Yes, babies are adorable. Yes, I love mine dearly. However, they cost a small fortune. So, today I will share with you one way I save money so that I can use my negative $14 on something non-baby.....like coffee...or a smaller purse that I will be able to use in 18 years.
Today's topic...
You can make your own baby wipes! I swear it is super simple and it can save you hundreds of dollars over the course of your baby's diapering days.
What You Need:
1 paper towel roll (Pro-Tip: I like to use Viva choose-a-size because they are cloth-like and you can take a little or a lot. You will only need 1/2 of the roll to make the wipes and you can save the other half to make another batch later on.)
1 plastic container
1 tablespoon of baby oil
2 tablespoons of baby wash
2 cups of water
Step 1: Find a plastic container (with a lid) large enough to hold half of a roll of paper towels. There is no perfect container and I will tell you I struggled to find the perfect one for me. This is where I had the hardest time. I tried a few containers until I found one that was just right. It was long enough ago that I couldn't even tell you where I got it (most likely Wal-Mart), but it is a tall, generic brand of tupperware. Basically, bring a paper towel roll with you when you go into the plastic container aisle and eyeball it to see if it will fit half of a paper towel roll inside. It really doesn't matter so long as it fits and seals.
Step 2: Pour in your liquids and swish them around a little bit.
1 tablespoon of baby oil
2 tablespoons of baby wash
2 cups of water
Step 3: Cut a roll of paper towels in half. I use a bread knife to do this...unless I lazily just pick up the nearest steak knife and start sawing away. You may want to incorporate this into your daily work out because it takes some muscle to saw through a roll of paper towels! Yes, it will look like a rat got into your stack of paper towels and left shreds all over the counter. This is normal. Then put your 1/2 of a paper towel roll in the container with the liquids, with the crazy shredded side on the bottom. *Leave the cardboard tube inside the roll for now.*
Step 4: Seal the container and flip it upside down. Let it sit there for about 10 minutes so that the paper towels can soak up all of the liquids.
Step 5: Open the container and pull out the cardboard tube from the middle.
Step 6: Get it ready for easy use. Here's where my method is slightly different from what other moms seem to do. Some people like to pull from the middle and keep their wipes in the same container. I, however, prefer the easy plastic containers that individual wipes packages come in. I clean it out and put my homemade wipes in it. Basically, I take the homemade wipes out of the tupperware container and fold them over on each other back and forth so that they will fit inside my wipes container, pulling the last wipe through the top of the container. This process takes a bit of time but when you have poop on one hand, you're holding the baby on the changing table with the other hand, and you have to use an elbow to open up the wipes container, you really want it to be as easy as possible. If it works for you to use the tupperware container, then please do. If you're a picky diaper changer like me, you can try what I do.
When I make them, I get approximately 100 wipes (sometimes more, sometimes less, depending on if it's the regular size roll or the giant roll).
Let's do the math.
1/2 roll of Viva Choose-a-Size paper towels: $.56
2 tbs of baby wash: $.13
1 tbs of baby oil: $.06
Total cost of homemade wipes: $.75 (<$.01 per wipe)
VS
1 name-brand container of wipes, 64 count: $2.37 ($.04 per wipe)
I read somewhere that people use, on average, 1.5 containers of baby wipes per week. That's 384 wipes per month. So you can either continue using store-bought wipes for $15.36/month...or use homemade wipes for $2.88/month.
You could save yourself about $150 a year!!
That's a lot of coffee.
*Where I got my mathematical figures:
My local price for Viva Choose-a-Size paper towels is $1.12 per roll, but you can save even more if you catch them on sale and/or with coupons.
I used generic brands of baby wash and oil.
Of course, there is an investment hidden cost. You'll need some kind of container to put the wipes in while you make them. The one I found was not too expensive (because I went generic)...maybe $5 total spent.
Friday, September 28, 2012
Toddler Food Recipes Gone Wrong
**UPDATE**
I've moved to ladybugsandlattes.com
You can find this post and more here
***
Right around when my baby girl was turning 1, I was consumed with finding fun and easy recipes for finger foods. Sure, she loved cut up avocados, bananas, and whatever I was eating. Bor-ing. I wanted to be that wacky mom that brought a unique snack to a play date that had all the kids drooling and all the moms in awe of my culinary prowess.
I did find a lot of recipes that I absolutely LOVE and I will share them some day, but not today. No. Today is a day to share my miseries.
Let's start with the Baby Chicken Fingers. These sounded perfect - simple ingredients and mushy enough for my Cadybug's gummy mouth. Heck, if they tasted good enough, I'd probably eat them right along with her. You can click on the link and see how they're supposed to look. Here's how mine turned out:
Lesson learned: Broiling is not a skill that I possess. And as someone who hates the feeling of raw meat squishing between my fingers and lurking under my fingernails, the whole process of making this recipe was not in my top ten "happy to be a mama" moments.
So let's move on to the Carrot Snack Sticks. I saw these on Pinterest and thought to myself, "This is exactly the kind of healthy snack I want to make for my carrot-loving baby!" Everything seemed simple and I had all of the ingredients. Well, I had baby carrots and not regular sized carrots. No big deal, right? A carrot is a carrot. No. It is infinitely more difficult to shred baby carrots than it is to shred regular carrots. Fingers were grazed and life lessons were learned. Regardless, baby carrots were the only carrots in my fridge so I kept plucking along. It was a minor wound that would result in what I thought would be the ultimate snack for the play date we were headed to the next day. They look so moist and delicious in the picture...Mine, however, turned out like dry, tasteless dog biscuits...except dogs would turn up their noses at these.
They shriveled up like brittle matchsticks and there was no way I could give these crunchy, dried up carrot biscuits to my sweet girl. How would her 4 tiny teeth mash through these monsters? The recipe says you really have to have patience when working with the dough. Maybe next time I'll find a Mother Teresa to work my carrot dough for me. I just did not have the patience to fold it into a dough, watch it crumble through my fingers, roll into dough again, watch it crumble again, and again, and again.
Okay, okay. Time to move on. Next stop: Carrot Chips. First of all, let's just get it out of the way and say that I only had baby carrots and I did not have the appropriate slicer...apparently. When you're on a budget, you make it work somehow. My family doesn't eat regular carrots, so I don't buy them. We eat pre-washed baby carrots that are easy to put in lunch boxes. We also don't have the fancy slicer in the recipe. I've never needed it before. Hello, that's what knives are for.
Or not.
As it turns out, a steak knife does not slice a baby carrot as nicely as an adjustable mandoline slicer would slice a regular sized carrot. So instead of thin carrot chips, I had miniature baked carrot stubs.
If you're looking for a potato chip alternative and you want to try out this recipe, go for it...but I don't suggest trying it with baby carrots and a steak knife.
After these adventures, I really started to question my ability to cook anything.
Tuesday, September 25, 2012
How to be a Freezer Cooker: 31 Prepared Meals in 2 Days
**UPDATE**
I've moved to ladybugsandlattes.com
You can find this post and more at http://ladybugsandlattes.com/2012/09/25/how-to-be-a-freezer-cooker-31-prepared-meals-in-2-days/
***
Man, am I drained from too much P! Planning, prepping, and preparing freezer meals is a job! Oh yes, it sounds great to cook a few meals and have them ready to go in your freezer for those days that you just can't get out of your flannel pajama pants, but the work you have to put into it is kind of exhausting. This is an obsession of mine that hurts so good.
Do you think freezer cooking is for you? Then set aside some time and give it a try. Your flannel pants will thank you next week.
Day 1
Step 1: Pick out your meals. I keep all of my recipes in a word document on my computer so that I can do a quick search for specific meals or ingredients. Pro Tip: Only pick out a few meals. The first and second time I did this, I picked out 6-8 meals and it took for-e-ver. I had my mom's help, but it still took way too long. This time around, I picked out 4 meals, and it still took forever (mostly because I chose to wait for my hubby to get home to cut the raw meat – yuck, raw meat).
Step 2: Create your shopping list. If you're a couponer like me, you might want to check what ingredients you already have stocked up and make your meal list from there. If you're rolling in the dough, pick out whatever meals suit your fancy. Choose meals that you think will freeze well. Clueless? Rummage around the internet for some ideas.
Step 3: Take that daunting trip to the grocery store. It may not be daunting for you, but personally, it doesn't thrill me to take a one-year-old out on a windy day and shuffle her around a grocery store while I attempt to compare prices, pick out produce that meets my standards, and continuously pick up the snack cup/toy/sippy cup/miscellaneous cart items that end up on the aisle floors. Don't get me wrong, I have a very well-behaved baby, but entertaining a child and concentrating on grocery shopping can sometimes be multitasking to the extreme.
Step 4: Set aside all of the dry ingredients you will be using. Make plenty of space in your fridge to hold other ingredients and store finished products.
Step 5: Call it a day. Trust me, you will want to be refreshed when you make all of this food. So sit on the couch, put your feet up, open up your laptop and create a Freezer Cooking Prep Sheet. This is where I create a table in a word document and fill it out with the different recipes I'm making and what cutting and cooking I need to do first to prepare for each meal.
Day 2
Step 1: Label your bags and containers. This is SO MUCH EASIER to do before you put any food in the freezer bags. I like to use a sharpie to write the name of the meal + directions for cooking right on the freezer bags. If it's something that I'm going to put in a container, I write on a piece of masking tape and stick it onto the container. Do it first. It will stick much easier now than when you already have it in the freezer.
Freezer Cooking Recipes
**UPDATE**
I've moved to ladybugsandlattes.com
You can find this post and more here
***
6 lbs beef round steak cut into strips
3 14.5-oz cans diced tomatoes (I used whatever I had on hand – some with chiles, some with garlic, etc.)
3 large onions, cut into strips or chopped
4 green peppers, cut into strips
2 red peppers, cut into strips
6 tsp cilantro
6 tsp cumin
6 cloves of garlic, minced
Salt and pepper to taste (I did 10 shakes of pepper and 4 shakes of sea salt in each bag)
1. Write on 6 freezer bags: Cook on low 8 hours (high for 4 hours). Serve on tortillas with sour cream, avocado, shredded cheese, etc.
2. Split all ingredients evenly into six bags and shake.
3. Lay flat in the freezer. (the bags, not you)
*I divided this recipe into 7 meals – 5 regular sized bags to feed my family of 3, and 2 smaller portion bags for my mom to make for herself. If you are preparing this for 2-4 people, I suggest dividing it evenly into 6 bags. Alternatively, if you are preparing this for more than 4 people, you may want to adjust how much you put into the bags or how many you cook at once.
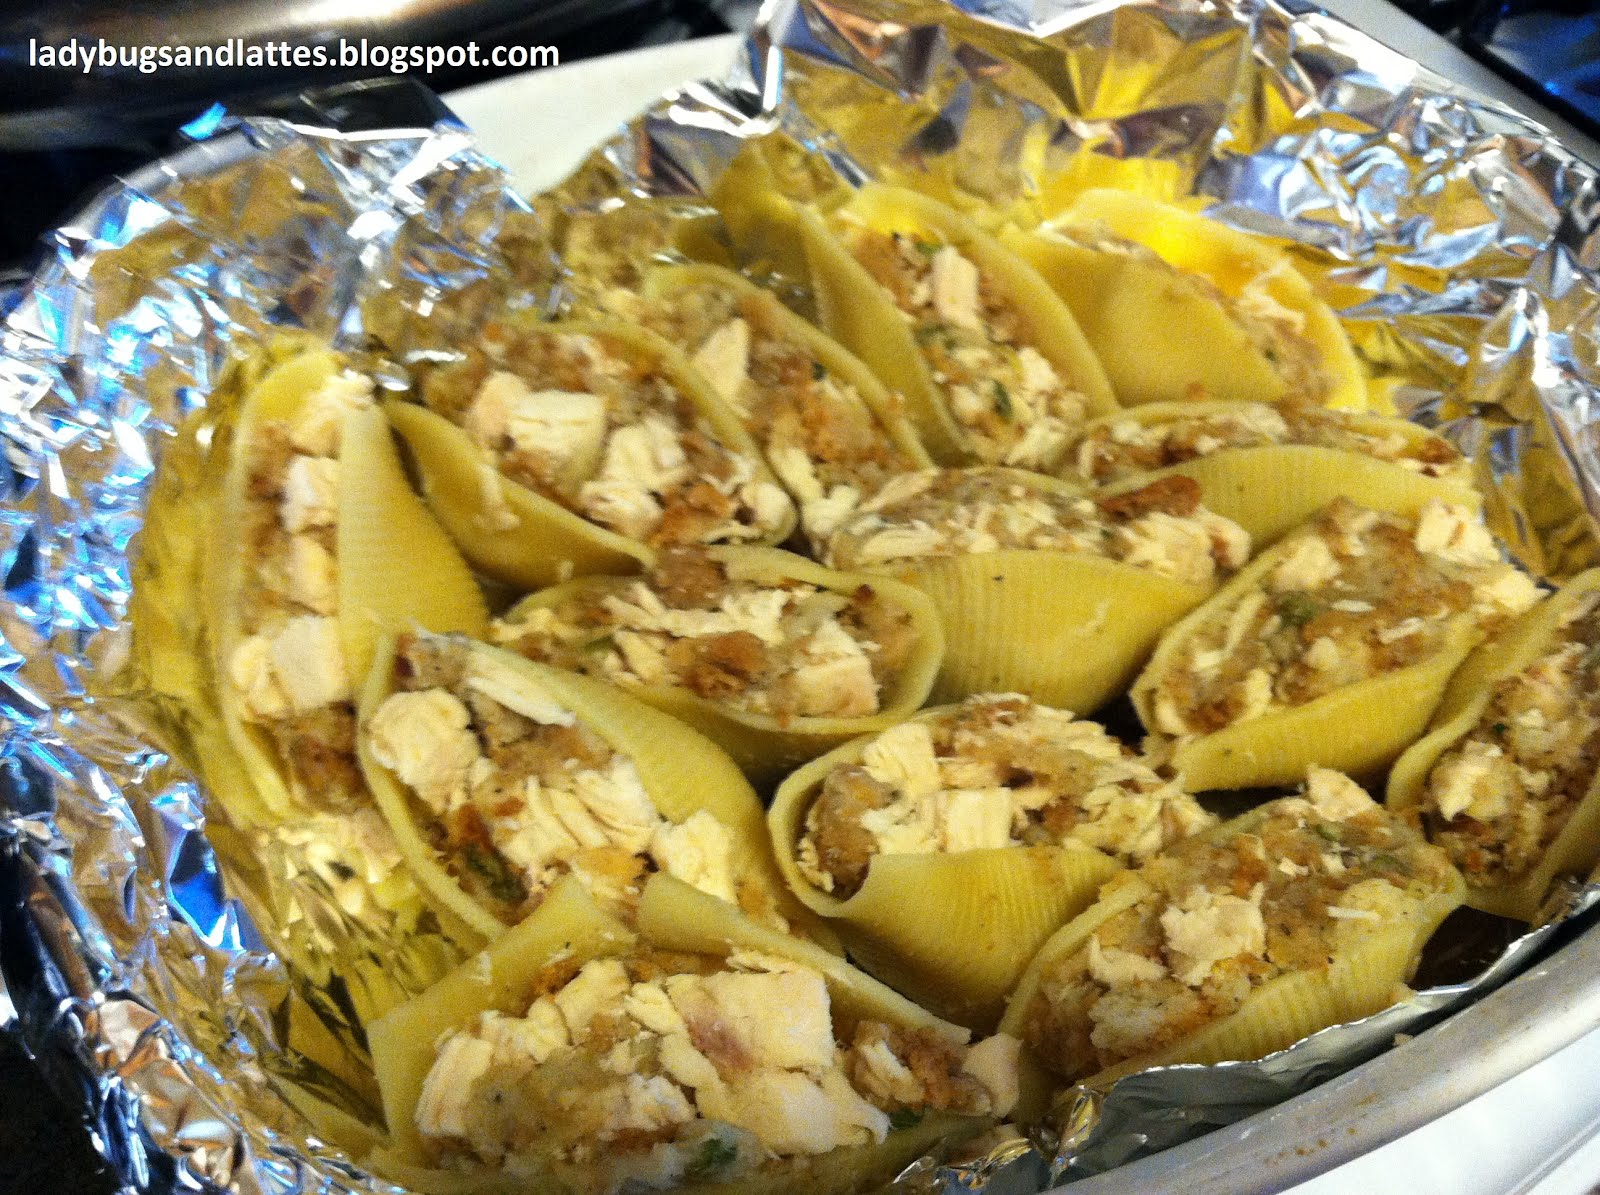
Chicken Stuffed Shells
18 oz package dry bread stuffing mix
3 boxes of jumbo pasta shells
2 cans condensed cream of mushroom soup
2 cans condensed cream of chicken soup
28 oz chicken broth
Salt, pepper, and garlic powder to taste
12 chicken breasts
1. Cook and chop up the chicken. You can shred it if you like, but I prefer chunks of chicken in my shells.
2. Cook shells al dente (8-10 minutes)
3. Prepare the stuffing mix according to the package directions
4. In a bowl, mix the chicken and stuffing.
5. Fill pasta shells with the chicken mixture and arrange them in a baking dish. (I highly recommend laying down aluminum foil first…you will already have a lot of clean up to do.)
6. Mix the soups in a saucepan with salt, pepper, and garlic powder. Cook and stir 5-7 minutes.
7. Pour the mixed soups over the tops of the shells.
8. Cover with aluminum foil and bake for 30 minutes at 350*.
9. Divide into Tupperware containers for dinners and freeze.
* Figure out how many you think you will want per meal and divide accordingly. My family LOVES these and we will eat leftovers for lunch the next day, so I plan for at least 5-7 per person (and 2 for the baby).
Baked Rigatoni
2 eggs
4 cups cottage cheese
2 boxes of rigatoni, cooked al dente (approximately 11-12 minutes)
1 large can of spaghetti sauce (approximately 3 cups)
20 oz frozen spinach, cooked and drained
1. Write on 2 very large containers: Thaw and place in a greased 2 ½ qt casserole dish. Sprinkle shredded cheese on top. Bake at 350* for 30 minutes.
2. In a mixing bowl, combine the eggs and cottage cheese.
3. Add the rest of the ingredients and mix together in the bowl.
4. Divide into 2 containers and freeze.
Onion Burgers
3 lb. ground beef
3 pouches dry onion soup mix
9 tbsp. water
1. Write on a freezer bag: Defrost patties and cook in skillet 10 min. or until done. Serve with buns, lettuce, tomato.
2. Mix the beef, soup mix and water together in a bowl.
3. Shape into approximately 14 patties (about ½" thick each).
4. Wrap individually and seal in the freezer bag.
5. Put them in the freezer.
Friday, September 21, 2012
Crockpot Apple Chunks
**UPDATE**
I've moved to ladybugsandlattes.com
You can find this post and more here
***
My baby girl loves apples and they were on sale at our grocery store last week. What a perfect opportunity for me to try out this recipe I found for Homemade Crockpot Applesauce (by comfyinthekitchen.com). In the too-short 25 minute nap Cadybug took in the morning, I cored, peeled, and chopped 10 apples (mostly Red Delicious). I don't have a fancy apple peeler - I sure wished I did that morning because peeling an apple by hand - not fun. Peeling 10 apples by hand - really not fun.
This is the equipment I had to work with:
I thought to myself, "Well, I don't have an apple peeler, but I do have a vegetable peeler...same thing, right?"
Wrong.
It took way too long to peel that apple and I nicked too many fingernails, and if I multiplied that by 10? Who has that kind of time anymore (or that many fingernails)? So the 9 unfortunate remaining apples were poorly peeled with a steak knife.
I do, however, have one tool in my kitchen that is a true culinary companion of mine. The Chopper.
This little baby saves me so much time and energy. He may be noisy, but he chops like a pro...and he's dishwasher safe. That's why we're so close. My non-dishwasher safe items end up sitting on my counter for days until I find the motivation to actually wash dishes by hand. Meanwhile, I look at them in disgust every time I walk by.
Then I put all of the apple chunks in my trusty slow cooker and added 1/2 cup of sugar and 1/2 cup of water. The directions say that sugar is optional, and I will probably use 1/4 cup next time instead. But when I read that it was optional, I actually said out loud "girl, in this house, sugar is not optional". (And then I went on cooking and pretended like it's totally normal to talk out loud to my computer.)
The directions also say to sprinkle cinnamon on top. Oh I did this...a little too well. I have shaky hands so a sprinkle of cinnamon is more like a thick dusting. Oops.
Cook on high for 4 hours. Let the delicious aromas fill your nostrils and make you want to eat everything in the house while it cooks because the smells will seriously make you that hungry. When it's done, you can mash or blend it up, but we ate it as sweet, sticky chunks of Heaven.
Now, this is the original picture of completed applesauce from ComfyintheKitchen.
This is mine.
Yeah. I think the darkness is due to me using darker apples...and perhaps the piles of cinnamon I poured over the top. It was good, though. So good. The hubs went back for thirds!
Self-given grade: Nailed it
Subscribe to:
Posts (Atom)